Christmas time is here and all the decorating has began. Since I moved in with my husband about 11 years ago and was able to afford my own place, I have always liked to choose a color scheme for my decorations. The first year in my little apartment with my husband and my little 3 month old baby I chose white and silver. Since then, I have switched to white and red, purple and silver, purple and teal, purple and white, gold and brown, gold and silver and more purple. This year I want to incorporate rose, brown and gold. Rose is a tone that its very in style. I know its very feminine so I also want to add touches of brown and gold. My first project was a wreath for my mantel. There are tons of different tutorials on how to make them and probably the easiest ones, in my opinion, are the ones made with burlap or think ribbon. This could be because the thicker the material, the more space it covers and the quicker it is to complete it. I have to admit that this particular wreath takes a little more time, but the results are worth it! And with all honesty, it is not hard to make at all. So here is how I made this gorgeous and super chic wreath.
I found this simple wreath at my local Dollar store. This store is not a Dollar Tree or a 99 cents Only store. It is just a local little dollar store that carries really nice items for only $1.00.
I removed all the green stuff so that I could have only the base. The size was perfect for only $1 :)
I used this pretty 1 1/2" rose satin ribbon that I also found at my Dollar Store. I used two 4 yards spools for the whole wreath.
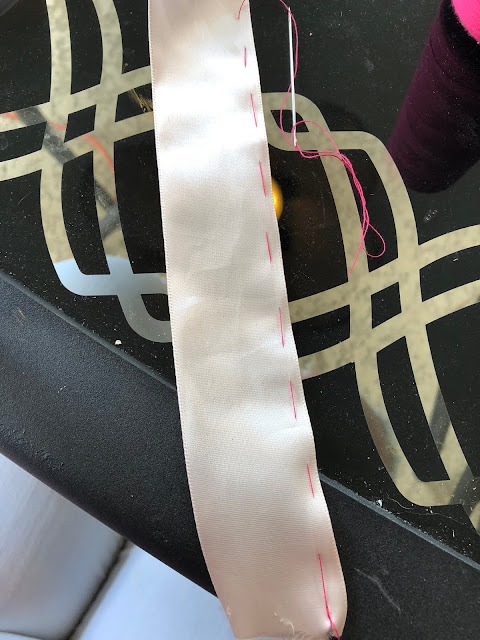
I also used a needle and pink threat. The thread won't be visible once the ribbon is layered but I still wanted to choose something that would go with the color scheme just in case.
My objective was to create ruffles with the ribbon to layer them and create a nice abundant effect. I followed a simple sewing pattern of about 1 centimeter. This does not need to be perfectly measured because the ruffles don't need to be perfect. But following the pattern will make the process easier.
I made the ruffles in sections. Making a very long section will probably make your life a lot more complicated when attaching it to the wreath. Once you think you have a section that you can work with, pull the thread to create the ruffle. I made ruffle sections of about 10 to 12 inches long. That means a longer section of ribbon of course, because when you pull the threat the section will obviously shrink.
I attached the ruffles piece by piece and continued until I had the outer circumference of the wreath covered. I continued the same technique layering the ruffled ribbon on top of the first layer.
Half way through the process I realized I din't want the center part of the wreath so I removed it and added one last layer of ribbon to cover the plastic entirely.
This is how it came out after six layers of ruffles. It is exactly how I had it pictured.
Now I tried to arrange the ornaments to have an idea of how I wanted them around the wreath.
After I arranged the ornaments to my liking, I hot glued them around. My favorite part about this wreath is the fact that the ruffles are very friendly, they can be moved and arranged and they will still look beautiful. I added a gold ribbon bow to add a metallic touch and I also glued a little butterfly hanging from the bottom of the wreath.

This is my first Christmas 2017 project and I am not disappointed at all. I love the pinks and the metallics together and this will definitely be the scheme I will try to put together for the rest of my Christmas decorations. I hope you enjoyed reading and that you find some Christmas inspiration for your own little projects. Stay tuned for more coming up :)


No comments:
Post a Comment